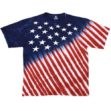
Stars Stripes T-shirt

So, you know when you have a really cute idea in your head and then it turns out slightly different but you’ve decided it can still work? This is that shirt. I saw a friend’s daughter recently who had a cute ruffle on the bottom of a plain shirt. She did that to lengthen the tee because it was getting too short for her daughter. Genius! So, I found a plain t-shirt in my daughter’s drawer that she was a little too tall for now and decided to give it a try. And this Stars & Stripes T-Shirt is what I made!

Here’s how you can make your own. Grab a t-shirt and some ribbon. I had both of these on-hand.

Now, you want to pin your ribbon to your shirt, right sides facing, with the edge of the ribbon lined up with the edge of the bottom of the shirt. See the top left picture. As your pinning, fold over the ribbon and pin. This will cause your ribbon to pleat. Then you want to measure the ribbon (or do this part before you pin to your shirt) and sew the ends together. Then just sew all the way around with a 1/4 inch seam allowance. One you’re done, fold down and iron. Then top stitch all the way around and you’re done. It’s perfectly cute all by itself.
But if you want to add some fun starts to your shirt, then you need to cut them out on freezer paper. I used a machine to cut mine out but the design is so simple, that you could easily cut out starts with an X-Acto knife.


Oh goodness, it’s even cuter on my little mooshkie.


So, there you have it. A pretty simple and totally personalized shirt that’s perfect for the 4th of July!!
Thanks for reading. See you soon!!


